Learning how to plait hair can seem like a bit of a trick at first, but honestly, it’s a skill that almost anyone can pick up with just a little practice. It’s a wonderful way to keep your hair neat, give it a different look, or even protect it from everyday wear and tear. You might be surprised at how quickly you get the hang of it, and then a whole new world of styles opens up for you, you know?
There's something truly satisfying about taking strands of hair and turning them into a neat, interwoven design. It's a method that has been around for ages, and for good reason. Plaits are not just for special occasions; they are a very practical choice for daily wear, for sports, or even just when you want to feel a bit more put together without a lot of fuss. In a way, it’s a bit like learning to tie a shoelace, once you get the motion down, it becomes second nature, so.
This guide will walk you through the fundamental steps to creating lovely plaits, helping you understand the motion and feel of the hair. We’ll go over what you need, how to prepare your hair, and then tackle the most common kind of plait, giving you a solid foundation. After that, we’ll touch on some other interesting variations and how to keep your plaits looking their best, too it's almost.
- How To Remote Into Raspberry Pi From Mac
- Delilah Distefano
- Sotwet%C3%BCrk If%C5%9Fa
- Bamboo Shoots Benefits
- Pier Luigi Forlani
Table of Contents
- What is Plaiting Anyway?
- Getting Ready to Plait Hair
- The Basic Three-Strand Plait – How to Plait Hair for Beginners
- What Are Some Other Ways to Plait Hair?
- Keeping Your Plaits Looking Good – How to Plait Hair and Maintain It
- When Should You Plait Your Hair?
- Are There Any Common Issues When You Plait Hair?
What is Plaiting Anyway?
So, what exactly is plaiting? Well, at its simplest, it’s a way of interweaving three or more separate strands of hair to form a single, structured length. Think of it like making a rope out of hair. Instead of just twisting, you are carefully passing one section over another in a repeating pattern. This creates a really strong and neat effect that holds the hair together. It’s a very old technique, and it's almost a universal hair styling method, really.
The beauty of a plait is how it transforms loose hair into something quite different. It can be sleek and formal, or loose and relaxed, depending on how you work with the strands. The basic idea remains the same: taking individual sections and joining them into one continuous piece. This can be done on your own hair, or on someone else's, too. It’s a pretty versatile skill to have, that is that.
Getting Ready to Plait Hair
Before you even think about picking up strands of hair, a little bit of preparation goes a long way. Getting your hair ready means you’ll have an easier time forming the plait, and the end result will look much better. It's a bit like preparing ingredients before you start cooking; everything just flows more smoothly, you know? This initial stage is quite important for a good outcome, so.
- Best Remote Iot Device Management Software
- Raspberry Pi Remote Device Management
- Declan James Mcmahon Stats
- Remote Access Mac From Raspberry Pi
- Remote Iot Control System
Gathering Your Supplies for How to Plait Hair
To begin your plaiting adventure, you’ll want to have a few items close at hand. These simple tools make the process much more manageable. You don't need anything particularly fancy, just some basic things you probably already have. A good brush or comb is very helpful for smoothing out any tangles, which is pretty essential, actually.
You’ll also want some hair ties or elastic bands. These are what you’ll use to secure the end of your plait, keeping it from coming undone. Clear elastic bands are often a good choice because they blend in well with most hair colors. Some folks also like to have a spray bottle filled with water, or a light styling product, just to help with flyaways and to make the hair a little more obedient. A mirror is also useful, especially if you’re doing it yourself, to see what you’re doing from different angles, you know?
Prepping Your Locks for How to Plait Hair
Once you have your items ready, it's time to get your hair prepared. This step is about making sure your hair is as easy to work with as possible. Start by making sure your hair is free of any knots or snags. A thorough brushing or combing from roots to ends will help with this. Smooth hair is much easier to divide into clean sections, so.
If your hair is very fine or slippery, a light mist of water or a tiny bit of styling cream can add some grip. You don't want to make it soaking wet, just slightly damp or with a little bit of product to give it some texture. This helps the strands hold together better as you work them. Some people find that hair that hasn't just been washed is actually easier to plait, as it has a bit more natural hold. It's really about finding what works best for your hair type, that is that.
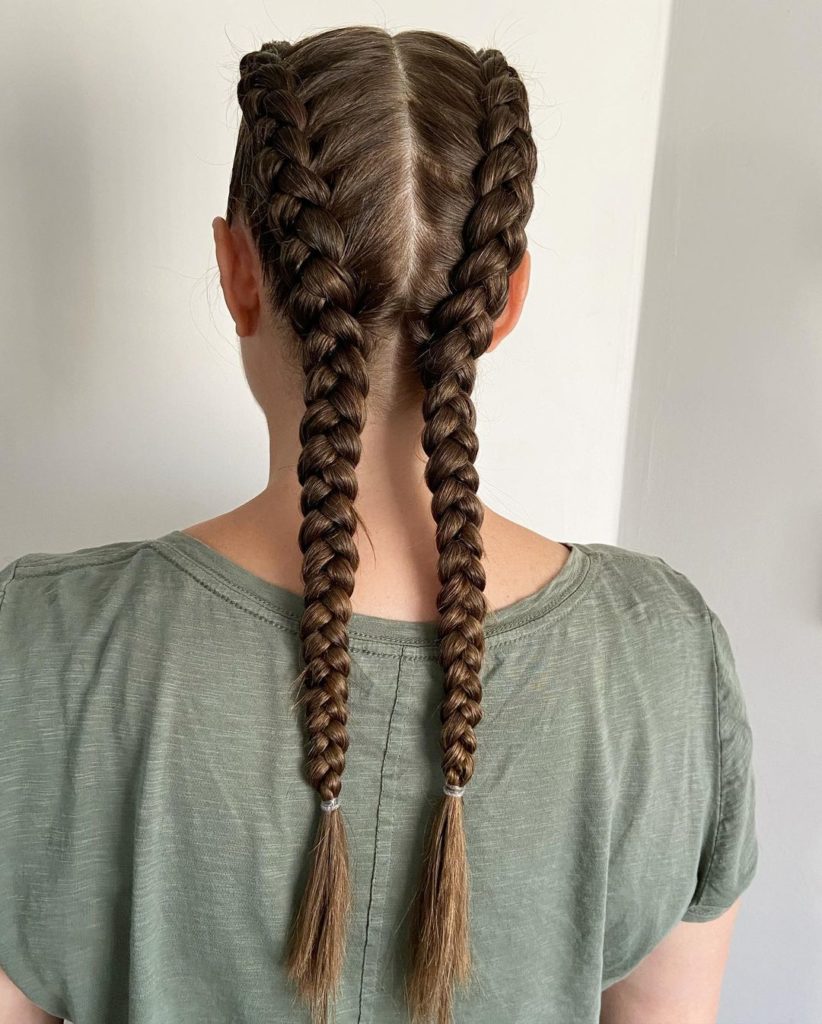
The Basic Three-Strand Plait – How to Plait Hair for Beginners
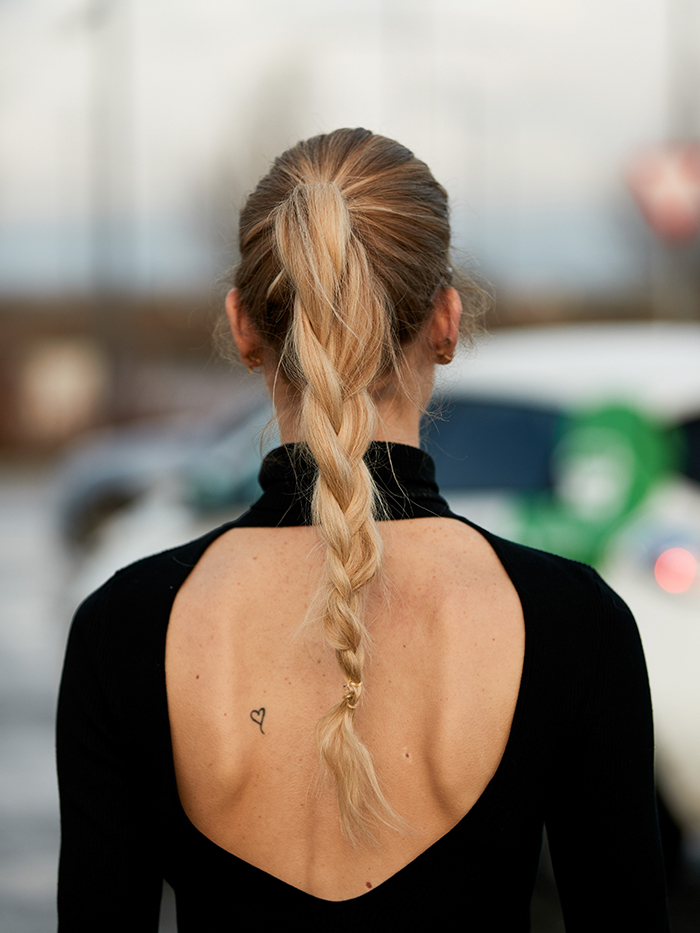
The three-strand plait is the foundation of almost all other plaiting styles. Once you get this one down, you'll find that other, more intricate styles make a lot more sense. It’s a very satisfying one to learn because it gives you that classic braided look. This is where the real fun begins, so.
Starting Your Plait for How to Plait Hair
To begin, pick up a section of hair where you want your plait to start. This could be at the back of your head, on the side, or even just a small section for a decorative touch. The size of this initial section will determine how thick your plait will be. Divide this section of hair into three equal parts. It’s important that these three parts are roughly the same size, as this will help your plait look even and neat. Think of them as 'left', 'middle', and 'right' strands, you know?
Hold these three strands comfortably in your hands. Many people find it easiest to hold two strands in one hand and one in the other to start. The way you hold them should feel secure but not too tight, allowing your fingers to move freely. This initial grip is pretty important for getting a good start, actually.
Crossing the Strands for How to Plait Hair
Now comes the main action. Take the strand from the far right and bring it over the middle strand. The strand that was originally in the middle is now the rightmost strand. The strand you moved from the right is now in the middle position. This is the first crossover. It's a simple movement, but it sets the pattern for the whole plait, so.
Next, take the strand from the far left and bring it over the new middle strand. Again, the strand that was in the middle becomes the leftmost one, and the one you moved from the left is now in the middle. You are essentially taking an outside strand and moving it into the middle position, then repeating on the other side. Keep repeating this pattern: right over middle, then left over middle, working your way down the length of the hair. Keep your tension even as you go, which is pretty key for a consistent look, you know?
Finishing Up Your Plait for How to Plait Hair
Continue the over-and-over pattern until you reach the end of the hair or as far down as you want the plait to go. You’ll notice the distinct woven pattern forming as you work. Once you’ve reached the desired length, gather the ends of the three strands together. This is where your hair tie or elastic band comes in handy. Secure the end of the plait with the band, making sure it’s tight enough to hold but not so tight that it causes discomfort. A double wrap usually does the trick, that is that.
After securing the plait, you can gently tug on the loops of the plait to make it look a bit fuller or looser, if that's the style you prefer. This is often called "pancaking" the plait. If you want a really sleek look, you might want to use a little hairspray to smooth down any stray hairs. You've done it! You've created a basic three-strand plait, and it's almost a magical transformation, really.
What Are Some Other Ways to Plait Hair?
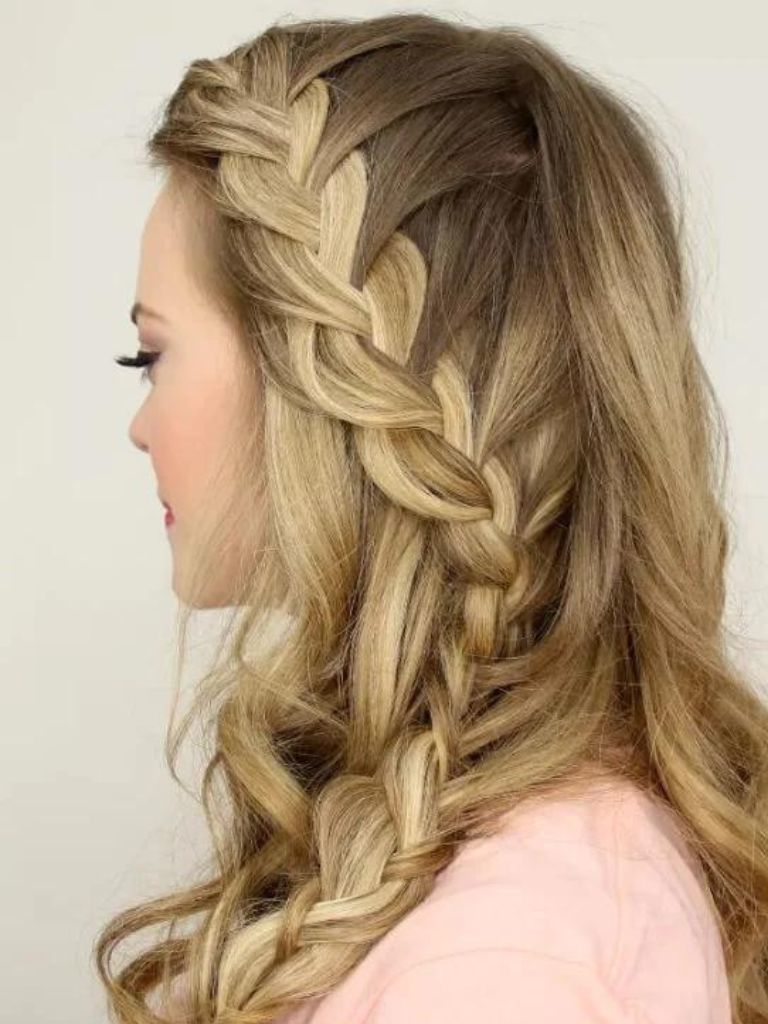
Once you’ve got the basic three-strand plait down, a whole world of other plaiting styles becomes accessible. Many of these build on the same fundamental crossing motion but add new elements. For instance, the French plait and Dutch plait are very popular variations. These involve adding small sections of hair from the sides as you work your way down the head, rather than just starting with one section, so.
A French plait creates a look where the plait appears to be sitting on top of the head, blending seamlessly. A Dutch plait, on the other hand, makes the plait stand out, almost like it's popping off the head. There are also fishtail plaits, which use only two strands of hair, and rope plaits, which involve twisting two strands around each other. Each style gives a distinct appearance, offering many different ways to express yourself with your hair. It’s pretty amazing how many looks you can create from a few simple ideas, you know?
Keeping Your Plaits Looking Good – How to Plait Hair and Maintain It
So, you’ve put in the effort to create a lovely plait, and now you want it to last. There are a few simple things you can do to help your plaited style stay neat and tidy for longer. How you prepare your hair, as mentioned earlier, is a big part of it. Using a light holding product can help keep flyaways at bay, for example, that is that.
During the day, try not to fiddle with your plait too much, as this can loosen the strands. If you're going to sleep with your plait in, a silk or satin pillowcase can help reduce friction, which means less frizz and a better-looking plait when you wake up. For longer-lasting plaits, especially those meant to stay in for a few days, you might want to consider using a stronger elastic band or even a small amount of hairspray to really set the style. It’s really about protecting your hard work, so.
When Should You Plait Your Hair?
Plaits are incredibly versatile, so they can be a great choice for almost any occasion. For everyday wear, a simple plait keeps your hair out of your face and looking neat. It’s a practical choice for school, work, or just running errands. When you're exercising or playing sports, a plait can keep your hair secure and prevent it from getting tangled or sweaty, which is pretty handy, you know?
Plaits can also be dressed up for more formal events. A beautifully crafted plait can look very elegant for weddings, parties, or special gatherings. They can be incorporated into updos or worn as a single, statement piece. Some people also plait their hair before bed to create heatless waves or curls when they take the plait out in the morning. It’s a very adaptable style, fitting many different situations and needs, that is that.
Are There Any Common Issues When You Plait Hair?
Even with practice, you might run into a few common challenges when plaiting hair. One frequent issue is uneven strands. If your three sections aren't roughly the same size, your plait can look lopsided or messy. The key here is to take your time when dividing the hair at the start. Another common problem is the plait feeling too loose or falling apart. This often comes down to not maintaining consistent tension as you cross the strands. Try to keep a firm, but gentle, grip on the hair throughout the process, so.
Flyaways can also be a bit annoying, especially if you have layers or very fine hair. A little bit of water, hair serum, or a light hairspray can help smooth these down. If your arms get tired, that's completely normal, especially when you're first starting out. Taking breaks and practicing in front of a mirror can help you find a comfortable position. Remember, it's all part of the learning process, and every attempt gets you closer to a perfect plait, you know?
So, we've gone over the basics of how to plait hair, from getting your tools ready and preparing your hair, to the step-by-step process of creating a classic three-strand plait. We touched on other plait styles, ways to keep your plaits looking good, and when they might be a good choice for your look. We also discussed some common difficulties you might face and simple ways to deal with them. The idea is that with a little bit of patience and practice, you can really get comfortable with this versatile hair technique.